Showing posts with label Heart2Heart. Show all posts

Thursday, August 23, 2018

Central Park Neighbors for AHSC #278


Hello again, crafty friends!  I've been working on a card for a very special person and this week's sketch at Atlantic Hearts Sketch Challenge was perfect for what I had in mind.  I will also be submitting it to the "Lovely Layers" theme at the Heart2Heart challenge and the "Blast From the Past" theme at the Three Amigos Blog Hop challenge (for #15 "machine die cutting" and #16 "embossing").

When my husband and I first began looking into buying our current home, the first people we told were our neighbors-to-be, Carl and Sandy.  They were a wonderful couple that we looked up to from the moment we moved into town and the thought of becoming neighbors as well was just the icing on the cake.  Fast forward a decade and a half, and sadly Carl has passed away and Sandy has an early form of dementia and is no longer living in her home.  I hadn't visited her yet because I honestly didn't think she would still recognize me but her daughter told me she brought Sandy back to her house for the afternoon and as they drove by my house, Sandy stated, "Oh, I'm so glad Annette got that house, I just loved having them for neighbors!"  Well, that completely made my day!  So I am planning to visit her soon but I wanted a special card to give to her, one that was pretty and cheerful and reflected what a special friendship we have been blessed to share.  I really hope she enjoys it, I have missed seeing her radiant smile and would love to bring one of those smiles on her face.  Anyway, here it is:

details:  I started with the Central Park paper pack and coordinating cardmaking stamp and die cut set.

Keeping in mind that Sandy's house is a cheerful yellow and mine is a pale gray, I wanted to incorporate those two colors as much as possible.  I used Pacifica cardstock, the Lemon and white striped/watercolor patterned paper from the Adventure Fundamental paper collection, more Pacifica, and this brick-patterned paper from the Central Park kit.  I used another lovely pattern from this kit that features various houses, trees, bicycles, and hot air balloons for the first vertical rectangle, inked the edges in Pacifica ink with a sponge dauber.  For the next vertical rectangle, I used Bashful ink with the cascading hearts pattern from the retired "Charming Cascades" stamp set, and inked the edges with Bashful ink again.

To create the houses, I used the Pacifica pigment ink pad to stamp the smallest house images from the Central Park cardmaking set twice on watercolor paper, cover with clear embossing powder, and heat setting it.  Once they had cooled, I pressed the centers of my Lemon and Mink ink pads so some of the ink was transferred to the inside of the lid.  Then I used a medium waterbrush to pick up the ink from the lid and paint it onto the houses.  For the die cut heart in the center, I used the pretty lace-patterned Blush paper from the Beautiful Friendship kit with the second-smallest of the stitched heart Thin Cuts dies.

For the sentiment rectangles, I used Mink and Lemon cardstocks, the retired "Tiny Typewriter" alphabet stamp, and Heather ink (I tried Mink but it wasn 't quite as dark as I thought it should be).  I used a small Momenta alphabet die cut set to cut "chance" from the same brick patterned paper, and "hearts" from the Bashful and white polka dotted paper (also from the Central Park kit).  Now all I need is a couple of daisies in a small vase, tied with a pink ribbon, and I'm all set to visit my sweet neighbor again!

Just a quick reminder:  You have until 10:55 pm Eastern/9:55 pm Central on Sunday, 8/26/18, to play along with this sketch at the Atlantic Hearts Sketch Challenge (you can enter your project HERE), and 11:55 pm Eastern/10:55 pm Central on Friday, 8/31/18, to enter your project in the Lovely Layers theme at the Heart2Heart Challenge (which you can submit HERE).  I hope you find time in your busy week for some crafting (hey, it's back to school week if you have kiddos!) and can share your art with one or even all three of these challenges, or at least take a stroll through their websites to get inspired by all the fabulous artwork you will find there.

Thanks for stopping by and happy crafting!  ~~  Annette


Thursday, July 26, 2018

Santa In July for AHSC #274


Hello again, crafty friends!  I broke out some oldies but goodies to play with this week's sketch at Atlantic Hearts Sketch Challenge.  I didn't plan to start on Christmas cards just yet but the first two ideas I had for this sketch didn't quite pan out, so I was inspired to think outside the box... or calendar page.  In addition to creating this card for this week's AHSC design team submissions, it meets the themes for a couple of other current challenges so I will be entering it to the Heart2Heart Challenge Blog for their Christmas In July; the Double Trouble Paper Crafting Challenge Blog for their Christmas Only theme; and the Three Amigos Blog Hop Challenges for their embossing theme.


details:  All products used are from CTMH and almost all of them are retired.  I started with the red "plaid" from the Believe paper kit.  The stamped image is from a set called I Believe (C1427) and inked in Holiday Red.  The scalloped edge frame was cut in Topiary CS using the Art Philosophy cartridge, and I used Pear colored mini-brads to add a little extra interest.

The tag is from the Home for the Holidays (SOTM in 2014) and was cut using the Art Philosophy cartridge.  The sentiment from the Santa Claus set (C1567) and was initially cut from the Artbooking cartridge but I was a little pressed for space so I ended up trimming it up a bit by hand.  Both images were stamped using a Sweet Leaf mini pigment ink pad, covered in clear embossing powder, and heat embossed.

I used some Topiary mini chevron ribbon to for embellishment and to secure the tag.  I used the scallop border Thin Cuts with white glitter paper.  To get a scalloped edge on the base layer too I cut the white glitter paper first, glued it so that the very edges of the scallops met the edge of the patterned paper, then positioned the solid-piece scallop thin cut over the glitter paper, taped the straight edge in place, positioned the piece so that the scallops faced the opening of the Cuttlebug, and then I just rolled them into the device only until I could feel the increase in pressure that indicated a cut was being made.  I had to finish trimming the dips between one or two sets of scallops but otherwise it worked very well.

And that's all there is to this one!  Don't forget the weekly deadline at AHSC is 10:55 pm Eastern/9:55 pm Central on Sunday, 7/29/18, and you can enter your artwork by going HERE.

Thanks for stopping by and happy crafting!  ~~  Annette

Wednesday, January 24, 2018

January SOTM Meets AHSC #248

Hello again, crafty friends!  I hope the beginning of 2018 is finding you happy, crafty and above all, healthy.  Luckily, I have been healthy but my tough-guy husband was sick for nearly 2 weeks so while I have been feeling creative, I haven't actually been able to spend much time actually crafting.  Between nursing my husband back to health, the bitter cold and the snowy weather we have been experiencing in the Midwest, it was a lovely change of pace to work with some light colors and floral-themed products for this week's sketch at the Atlantic Hearts Sketch Challenge.


details:  I started with a 7 x 5" base of Heather cardstock and topped that with a 6.75 x 4.75" layer of Bashful which I embossed with the rose embossing folder and lightly sponged Heather ink onto.  I then  used Fern and Bashful inks with this image from the January 2018 SOTM "Bloom & Grow".  I used multiple layers of stamping with the same inks to create these roses and leaves using the Beautiful You stamp set and coordinating Thin Cut dies.  Of course, no project is really complete without a little sparkle or bling so I added some gold glitter gems to the center of the flowers and the lower right corner, a gold ribbon and bow cut from gold glitter paper using the Thin Cuts ribbon border, and this lovely gray and gold ribbon from the Basics ribbon pack.  I thought it still needed a little something so I filled in the word "planted" with the new Bashful shimmer brush.  I will be submitting this card for the Fern-Heather-Bashful theme at the Color My Heart Color Dare #275 and the "tool time: Bashful shimmer brush" theme at the Heart2Heart challenge blog. 

Of course, this project started with the sketch from AHSC challenge blog.  We would love to see your take on this sketch too so if you find yourself with some crafty time on your hands this week, you have until 10:55 pm Eastern/9:55 pm Central to link your projects HERE.  I hope you also take a minute or two to check out the fabulous creations brought to you this week by the rest of the design team

Thanks for stopping by and happy crafting!  ~~  Annette

Saturday, January 13, 2018

Quilted Congrats

Hello again, crafty friends!  I hope you are all having as much fun this weekend as I am, which is in the middle of an annual 3-day crop, probably the biggest scrapbook event I attend all year.  So much crafting fun going on, and so much inspiration!


 So here is something I've been wanting to do forever and it was so much fun to put together!  I will be entering it in the Heart2Heart "something new" challenge as well as the Color My Heart challenge blog for their Bashful, Glacier, and Charcoal theme.  The beautiful quilted die cuts are from MFT Stamps, the sentiments are from retired CTMH sets "Cute Koalas" and "Expecting."  Thanks for stopping by and have a crafty weekend!  ~~  Annette


Wednesday, December 27, 2017

Last Christmas Card of 2017 for AHSC #244

Hello again, crafty friends!  I truly hope everyone had a truly wonderful Christmas holiday!  Several of my family members got sick over the holidays so we haven't been able to get together with everyone just yet but maybe this will just help us extend the magic of the season.  At any rate, I procrastinated a lot less this season but I still found myself running behind for a couple of projects so I managed to get one more Christmas card put together and this week's sketch at the Atlantic Hearts Sketch Challenge worked out perfectly for what I had in mind. 


This card is for my best friend's daughter who happens to have Downs Syndrome, and she is one of the sweetest people I have ever met.  She is still a big believer in Santa and she has gotten into adult coloring books just lately (which is what we got her for her gift this year) so I thought it was only fitting to work in some watercolors on her Christmas card to show her I still like to color too!

details:  I started with the Christmas themed paper from the first year I discovered CTMH, which is called Believe.  I used black Memento ink to stamp this adorable Santa and reindeer images from last year's Reindeer Bells set, which I then filled in with watercolor pencils.  To frame the images, I ran pieces of white and Topiary (retired) cardstock through my Cuttlebug using this scalloped die with an embossed stitched border from My Favorite Things (MFT) and pieced them together.  For the sentiment, I used Versamark ink and white embossing powder with the retired Say It All stamp set.  Due to the stamped images I chose, I will also be submitting it to the Christmas Critters theme over at the Heart 2 Heart Challenge.

And now I officially done with the last of my Christmas cards and gifts and ready to get started on my goals for 2018, which definitely included more crafting projects!  I hope crafting continues to be in your future too, and that you find time to play with this week's sketch at AHSC.  As always, you have until 10:55 pm Eastern/9:55 pm Central on Sunday, 12/31/17, to link your project HERE.

Thanks for stopping by happy crafting in 2018!  ~~  Annette


Wednesday, December 13, 2017

Silver and Gold Anniversary Wishes


Hello again, crafty friends!  I found inspiration from this week's sketch at Atlantic Hearts Sketch Challenge to make a festive - and shiny - anniversary card for my husband.  I designed it so that it looks like a "happy new year" kind of card because we actually eloped on December 31st over 30 years ago.

There is also a Silver and Gold theme going on this month at the Heart2Heart challenge blog this month, and it's been a long time since I've played along with their challenges so it will be a fun bonus for me to add this card to their gallery.


details:  I started with an 5.5 x 4.25" base of gold foil paper.  I ran a 5.25 x 4" piece of black cardstock through my Cuttlebug with the retired CTMH confetti embossing folder, and then I used a handy little hole punch tool from the Martha Stewart collection to punch out each of those holes so I could back the black with the gold paper and hopefully the pattern would look like shiny champagne bubbles rising to the top of the glass.  I then cut strips of silver and gold foil paper as well as strips of silver and gold glitter paper, all at 5/8 x 4", ran the glitter papers through the retired scallop border punch, and adhered them onto the the foil papers to create a scalloped interpretation of the 4 horizontal lines element of the sketch.  I used gold embossing powder and Versamark ink to heat emboss this sentiment from the retired Say It All stamp set on black paper backed with more silver foil.  The image of champagne glasses is from the M-sized Good Cheer stamp set (you will need to mask or carefully "amputate" the image to get the glasses without the sentiment in the middle), stamped with black Memento ink on White Daisy cardstock backed with another layer of both silver and gold foil papers.  I couldn't resist adding one more touch of sparkle by filling in the champagne glasses and bubbles with the gold shimmer brush, one of my favorite embellishments!

There are so many possibilities with this sketch at AHSC and we would love to see your take on it.  As always, you have until 10:55 pm Eastern/9:55 pm Central on Sunday, 12/17/17, to link your projects HERE.  You can also check out the rest of the design team's creations by following THIS link.  Happy holidays!  ~~  Annette

Tuesday, February 21, 2017

Hello Lovely Wedding Card for BTF Challenge 40

Hello again, crafty friends!  Even though it's been a fairly mild winter where I live, I am still longing for spring so I've been having a great deal of fun playing with the beautiful floral and spring colored geometric patterns in the Close To My Heart "Hello Lovely" kit for my design team submission for this week's challenge at the Between The Folds Bi-Weekly Challenge Blog.

I was particularly inspired by this week's sketch over at Mojo Monday so I used it as my starting point.  I used a standard 4 1/2 x 5 1/2" card base in Desert Sand and cut the dot patterned Sorbet paper for the foundation layer.  I cut a piece of Colonial White cardstock at 3 1/2 x 4 5/8" and punched the edge with a scallop pattern and topped that piece with a 2 3/4 x 4 5/8" panel.  I used one of the PML cards from the Hello Lovely kit and trimmed the 1/4" from the top of this 4 x 3" vertical panel and dovetailed the bottom to form the banner shape.


For embellishments, I used the medium and small hearts from the Hello Lovely complements placed on the same patterned paper as the foundation layer and fussy cut around them.  I used my favorite white and gold ribbon to form the bow which is tied around this antique rose charm which is the last one from the first set of Base and Bling set that CTMH came out with.

For the sentiment, I used Desert Sand ink with the retired Mr. and Mrs. set.  I can't help but feel this paper kit lends itself perfectly to wedding cards and layouts, but maybe that's because there are a couple of spring weddings coming up in my family!
The Hello Lovely kit is also this week's theme at the Color My Heart Color Dare and one of this month's themes at the Heart 2 Heart Challenge Blog so I will be entering this card in both of these challenges as well as the sketch challenge at Mojo Monday.

Thanks for stopping by and happy crafting!  ~~  Annette

Tuesday, July 12, 2016

Magical Mojo for BTF #25

Welcome!  Growing up, my brother was a big fan of "The A-Team" so we had to watch it every week and while it wasn't my favorite program, I did always like one character's saying at the end of each episode, "I love it when a plan comes together."  Well, this project is one of those times when Plan A didn't pan out and I didn't actually have a Plan B but thank goodness inspiration - or rather, inspiration from multiple sources - came together and I finally have a cute little card to share with you.

For starters, the theme this week at Between The Folds challenge is CTMH's Magical paper kit.  This is a really fun, super versatile collection of patterns and colors.  My first intention for my design team project this week was a very involved layout featuring
a trip to a nearby "red" or Farmall tractor museam for so my husband's birthday last week; it will be great when I have this project done, but considering I took 98 photos, that's not likely to happen this week.  So, back to finding a Plan B.  Luckily, as soon as I saw this week's Mojo Monday I fell in love with it and immediately pictured several variations of cards using the Magical papers.  After some dabbling, this is what I came up with.

Thanks for stopping by, and please take time to check out the other projects at BTF challenges and hopefully you can share your inspiration too (you have until Monday, 7/18, at 10:55 pm Central.  Happy crafting!  ~~  Annette

details:  All products used are from CTMH.  As stated, I started with the Magical paper kit and this sketch over at Mojo Monday.  I used a piece of Crystal Blue CS cut at 4 1/8 x 3 3/8" and topped that with the large polka dotted piece measuring 4 x 3 1/4".  The yellow dotted medallion was cut with the Art Philosophy Cricut cartridge at 2 1/4" ( image found in p.31 of the booklet) and the center circle was cut at 2" using white CS.  I used the medium flat waterbrush and ink pressed into the lid of the Crystal Blue ink pad to create a subtle background color and then I stamped the main part of the sentiment in Sapphire ink using the Beyond Awesome stamp set.  Using the same set and Cranberry ink, I stamped and fussy cut the curved "awesome" banner and glued it onto the medallion.  The bottom banner is one of the zip strips backed by Whisper CS, both of which were just trimmed by hand until I got the look I wanted, with the patterned piece being about 2 1/4" long.   For embellishments, I chose to color a couple of the white enamel stars with the turquoisegolden yellow, and carmine ShinHan alcohol markers.

I am also entering this card into this week's Color My Heart and the 7/4/16 Heart 2 Heart dare, where the themes are also the Magical kit.

Friday, January 29, 2016

"One" Challenge at H2H

The first challenge of 2016 over at the Heart 2 Heart blog is, appropriately enough, entitled "One."  As we get closer to February, I was looking for a new hearts and love themed display for the shelf above my craft space and I came across this photo I've had for ages.  I am guilty of never liking to see photos of myself but this one still manages to make me smile.  It was taken by a dear friend when my husband and I got to spend an evening out without the children, which was quite a rare treat considering one child had severe epilepsy and cerebral palsy and the other had life threatening food allergies.  Anyway, we all had a great time that night and I couldn't think of a better photo to use for a Valentine display and, coincidentally, this is the first layout I've completed in the new year!
details:  The background paper is from the La Vie En Rose paper pack.  I used the Artbooking Cricut cartridge to cut the photo mat in Pixie CS and added the Ruby colored hearts from the retired Stuck On You Puffies.  I also used Artbooking to cut both sentiments twice, once in the older version of CTMH's Fundamentals as the Ruby color had a clear embossed heart pattern on it, and I cut another layer in Black CS for a shadow layer.  I then used the Designed Decor Black Shadow Box Frame which is turning out to be my go-to for displays.
Note:  This smaller picture was my first version in which I used Ruby for the photo mat and Pixie for the title words, but I was disappointed in how much the words blended in with the background and essentially got "lost," so I just thought I'd share in order to encourage newer scrappers to take time to play with color and various options because sometimes a really small change can make a big difference!
And that's all there is to this one.  Thanks for stopping by and happy crafting!  ~~  Annette

Monday, September 1, 2014

Inspired by...

As soon as I got my new Chalk It Up paper kit I knew the first project I wanted to use it for was the Heart 2 Heart inspired by a movie challenge.  But, almost as soon as I decided that while this was the perfect paper to spotlight the movie I had in mind, my layout would be more about an unexpected pleasure in my life:  the fact that not only does my teenage daughter still want to go to movies with me but she and her best friend sometimes invite me to go with them.  Since my daughter graduated a year before her friend, her friend and I have even gone to see a couple of films together.  The three of us are self proclaimed book nerds and I love that we have a lot books and movies in common.  Even more than that, though, I treasure these times with my daughter because I missed out on these years with my own mother who passed away when I was 17 years old.

So, here is my project which was inspired primarily by the movie "The Fault In Our Stars," from the book by John Greene, as well as the favorite movies I have seen with just my daughter, just her friend, or the three of us together.  I have also included it at this week's Color My Heart challenge to use Lagoon, Flaxen, and Sorbet, which happen to be featured colors in the Chalk It Up kit.


details:  Chalk It Up paper kit, Circus alphabet (July stamp of the month); and the Artiste Cricut cartridge for the word bubbles and the film strips (each strip is actually 2 individual strips "welded" together using my Gypsy).

Happy crafting!  Annette


Friday, February 14, 2014

Nobody's Perfect

If I had to sum up what I have learned from 27 years of marriage it would be "neither of us is perfect, but we are perfect for each other."  Of course, I couldn't find a stamp set that said that so I based my card around including that as a hand written sentiment inside the card.  There is also one stamp that has reminded me of my husband from the first time I saw it in an Idea Book so when I saw this week's sketch at Atlantic Hearts Sketch Challenge as well as the "hearts galore" theme at the Heart 2 Heart challenge blog, I knew this would be the "perfect" time to ink it up.


details:  All products are from CTMH.  I broke out my discontinued "For Always" paper kit and the stamp set that came with the scrapbooking Workshop On The Go.  In case you aren't familiar with those papers, they are all variations of black and white but they take on color very well so I used my (discontinued) Tulip ink pad to add color to the flowered paper.  I also used the Tulip ink to stamp the heart image and Tulip paper to back the checklist stamp.  I used Black Shimmer Trim for the horizontal stripe and one of the Clear Sparkle Flourishes.  I sponged black ink around both the cardstock base for the checklist as well as the stamped heart and I also used pop up adhesive behind the heart to add a little dimension.
For the inside of the card I used the Art Philosophy Cricut cartridge to cut the heart and black ink to edge the heart and stamp the sentiment from the In The Moment set which reads, "The best love is the one that makes you a better person without changing you into someone other than yourself".  After I had adhered the heart I thought it was lacking a little something so I carefully peeled it up and used the Flight of the Arrows set for a little background flair.  Of course, since I added this touch at the last minute and *after* I had all the layers on the front of the card, the image didn't stamp  perfectly but I minimized that a little by offsetting the heart and even with the imperfect stamping I like it better this way than with the heart centered on a plain background.  Finally, even though I hate my handwriting I included the handwritten note about not being perfect.  I have to say, this is *the* perfect Valentine for my handsome, charming, and very patient husband!

Happy Valentine's Day to all!  Annette

Thursday, February 13, 2014

Wild About Love

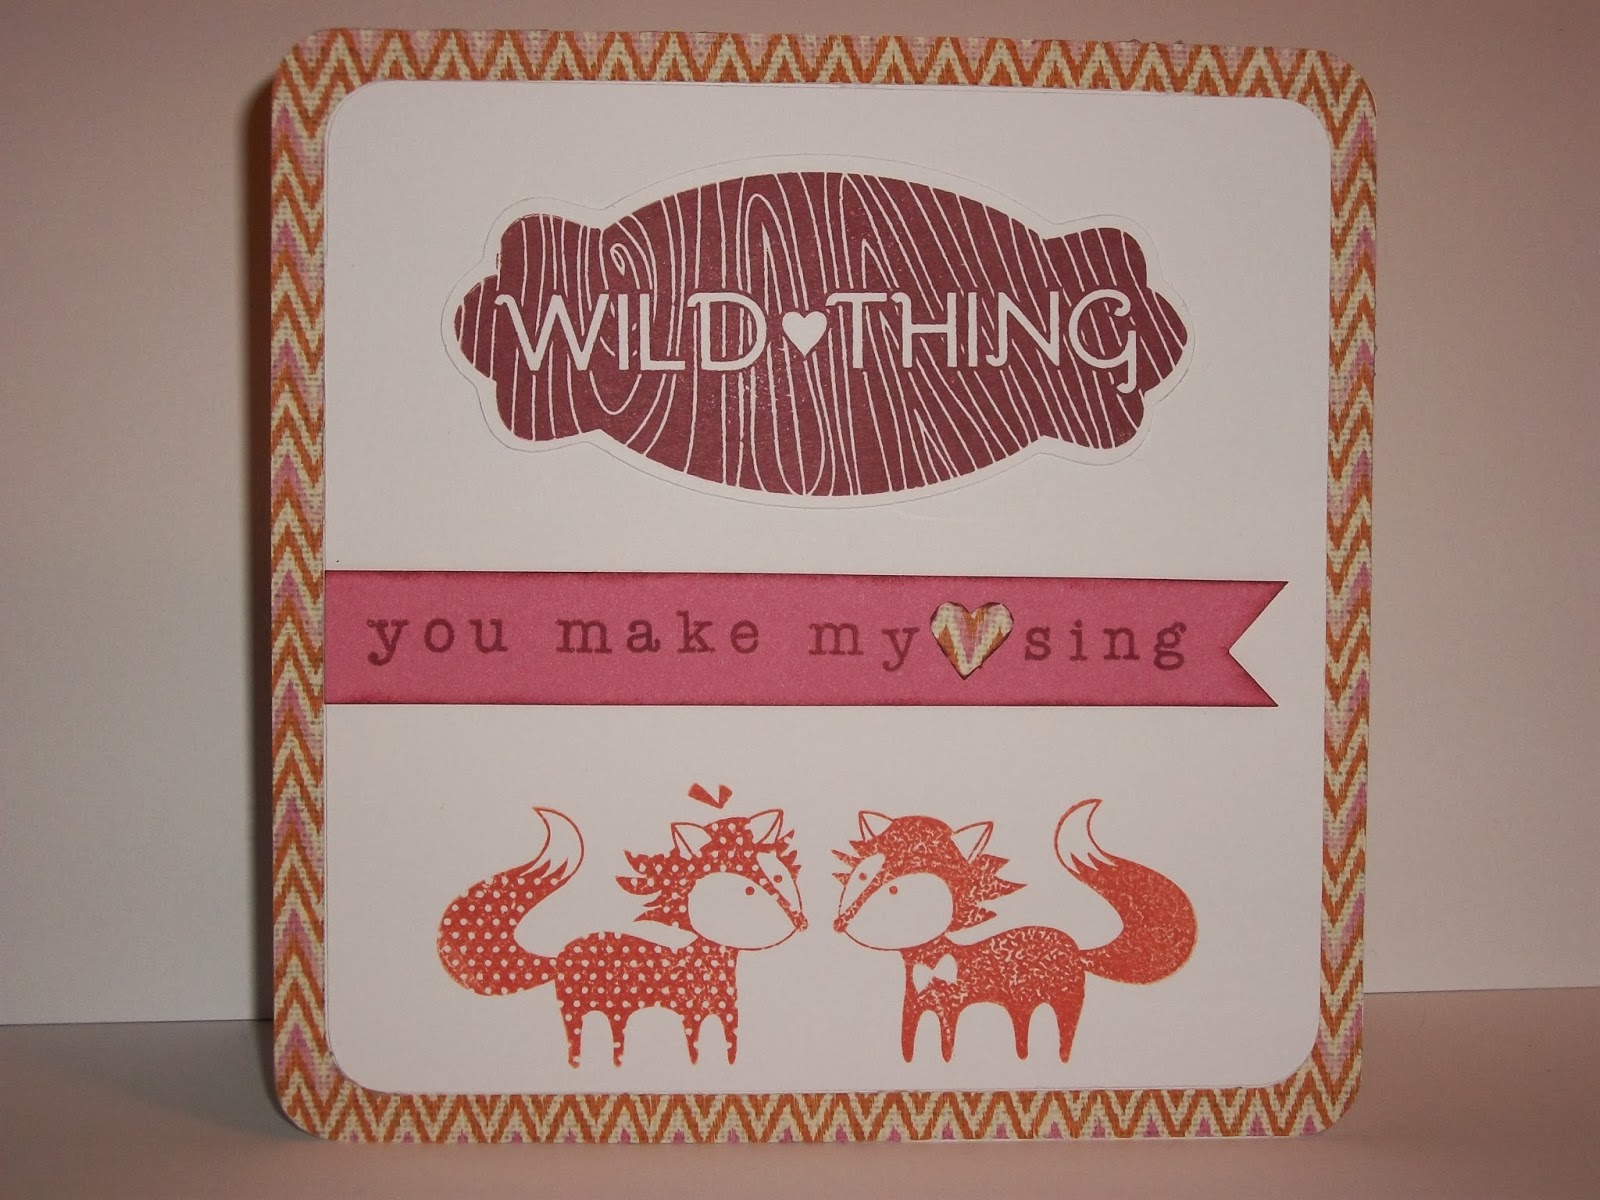
We all have those weeks where daily life gets in the way of our crafting, and this was one of those weeks.  Nothing big, just lots of little things to keep me a little extra busy so it was taking me longer than usual to figure out what I wanted to try with this week's color combination at Color My Heart (which was Ruby, Cotton Candy, and Sunset) and the sketch at CAS(E) This Sketch.  So even though I didn't make the deadline for either challenge I found that I still wanted to make it, even if it was just a chance to get my fingers inky again.  :-)
details:  All products are from CTMH.  The border is from the Sarita paper kit, the banner was stamped with Ruby ink on Cotton Candy cardstock using the discontinued (but still my go-to) Tiny Typewriter alpha.  All  the other stamped images are from the February Stamp of the Month, "Wild About Love."  I even used the small heart from that set to stamp on the opposite side of the patterned paper I used for the border and then I just cut the heart out so the side I wanted to use was the right shape but free from ink.  I also sponged the edges of the banner with Ruby and stamped the "wild thing" image on a shape I cut with the Art Philosophy cartridge.  This makes me think of grade school Valentines and makes me nostalgic for the days when I had little ones that age.


Happy Valentine's Day to everyone!

Annette
Sunday, February 9, 2014

a valentine for my sweetheart

Even though I had a card in mind based on this week's sketch at the Atlantic Hearts Sketch Challenge, I hadn't planned on crafting but my sweet husband is quite under the weather today and has barely left the couch (which is right beside my craft area) so I have been keeping him company while making a Valentine's card for him.  I will also be entering this card in this week's challenge at the Heart 2 Heart challenge blog (where the theme is 'let love inspire you') and the Pile It On challenge where the theme is dots and/or stripes.
details:  All products are from Close To My Heart.  I used the retired Sweetheart paper kit (one I've been hoarding forever, lol) which features Cotton Candy as well as the discontinued colors Baby Pink and Tulip.  I used the Art Philosophy cartridge for the lacy hearts border and the shape I stamped the sentiment on, and I used my Gypsy to "hide" the cutout pieces in order to make my own "shadow" on black cardstock to place behind  the pale pink to make it stand out.  I used black ink to stamp the sentiment from last year's January stamp of the month, Happy Valentine's.  I also  used all 3 sizes of black sparkles that come in the package to anchor the empty space on the tag.  FYI, the horizontal border at the top of the card was pieced together from various strips of the Sweetheart scraps, as I felt like it needed something to balance that space and that element needed to have some color but not be as busy as the main paper.

Thanks for stopping by and Happy Valentine's Day to you and  your loved ones!
Annette

Sunday, January 26, 2014

Love You to Pieces

I have spent a relaxing evening making cards while watching movies with my husband and when I came across an unfinished project from a year ago I immediately knew I could put it to use for a couple of current challenges.  I am using the sketch from Freshly Made Sketches and also sharing at Heart 2 Heart where the challenge this week is "two faced" or to use both sides of a designer paper.


details:  All products are from Close To My Heart.  I used the discontinued Roxie paper kit for the pieced heart as well as the card base as well as the discontinued Tulip for the banner.  I cut black shimmer trim in half to line the banner on the cover as well as the border inside the card.  I used Tulip ink for the sentiment from last year's "Happy Valentine's" Stamp of the Month on the cover and from the Stitch Wonder stamp set inside the card.  The large puzzle piece heart on the cover as well as the puzzle piece border on the inside were cut using the Artiste Cricut cartridge.

Happy crafting, Annette

Ivy Lane for Atlantic Hearts Sketch Challenge

I have only purchases one paper kit from CTMH's new Idea Book so far and I'm totally in love with it!  It has taken me several days to put this project together based on this week's sketch at Atlantic Hearts Sketch Challenge  I say project because I knew what elements I wanted to put together but they didn't size up quite the way I wanted so the finished size is 6 x 7 1/2 inches, so rather than using this for a card I'm thinking of making it the cover for a mini album.  I am also sharing this at this week's Heart 2 Heart challenge which calls for using both sides of a designer paper.


details:  All supplies are from Close To My Heart.  The green background paper and the multicolored paper for the vertical scalloped stripe are opposite sides of the the same paper from the Ivy Lane papers, and for the border I used the zip strips from the same kit and carefully mitered the corners.
I used the Artiste Cricut cartridge to cut the center shape and the scalloped stripe.  I sponged the edges of the center piece with the discontinued Pansy Purple and then I used the rock and roll stamping technique with the new Hello Wonderful stamp set in Blush and Hollyhock.  The sentiment in the corner is from the In The Moment, also using Pansy Purple.  To  make some of the cutout areas in the Cricut cut images stand out a little better, I added bitty and medium sized Opaques.

I have a feeling these stamps and this paper kit are going to be seeing a lot of use at my house!

Happy crafting,  Annette

Sunday, December 30, 2012

last minute inspiration gift tag

So, I'm posting this project too late for for anyone to use for this Christmas, but gift cards are a year-round gift giving staple these days so I thought I would go ahead and share as there are many different sentiments that could be used in the middle.  I am submitting it in the There She Goes weekly challenge, with this week's theme being "last minute Christmas," as well as the Heart2Heart Christmas part 4 challenge.  I had actually been working with this particular tag for a couple of weeks but was never quiet satisfied and then on the 23rd I got the idea of wrapping the ribbon around it and tying the card closed.

It was a little tricky but I loved the effect when I was done.  I kept this one simple and hand-wrote a message and used double sided tape to adhere the gift card to the inside without damaging anything on the back of the card.

details:  All materials used were from Close To My Heart except the ribbon, which is just something I've had sitting around for a long time and was trying to get used up.  The card base was cut with the Art Philosphy cartridge using Cranberry paper, the stamp set used was (C1469) December 25th using New England Ivy ink on White Daisy CS.


On a side note, I only wrapped 1 present in traditional wrapping paper and used 1 purchased gift box for my daughter's gifts, and for the rest I used CTMH paper and/or boxes made using the AP cartridge.  It just so happens that a year ago I bought new Christmas ornaments, tree skirt, etc. and had gone to using red, green, and gold for Christmas so the Pear and Partridge and Believe papers looked really nice with a touch of gold thrown in.

Monday, October 22, 2012

guest blog for H2H Halloween or pumpkin challenge

I have a special treat this week:  my friend Kenya made this adorable treat holder and she isn't a blogger yet so I suggested she be a guest blogger and enter her creation on this week's Heart2Heart: Halloween or pumpkin challenge.   I know you will enjoy her project and I hope you will leave her lots of comments so we can have her guest again or start a blog so she can join us more often!~~Annette

Kenya:  I saw a tutorial online for this treat holder some time ago but I can't remember exactly where.  The papers are from a collection I picked up at Archiver's but I used the CTMH Magic Potions (C1509) stamp set and Cocoa ribbon and ink.

Directions:
1)  I started with 2 empty cardboard ribbon spools and I tore one end or top off of each spool and then I decorated the end and what would have been the center of each spool.
2)  I used a sheet of overhead projection paper/acetate for the tube.  You choose whatever height you want or that works for you, but you need to cut the width so it's 1/4-1/2 inch wider than the circumference of the ribbon spools and glue together the overlapped (width) edges so that it forms a tube shape that will just fit inside the spools.
3)  I removed the top piece and punched 2 holes in the side of this spool (where the flowered paper is in this picture) so that the holes are opposite each other.  I put the top piece back over the tube and used a marker to indicate where I needed to make holes in the tube piece.
4)  I glued the bottom piece to the acetate tube (I used glue dots) and filled the the tube with treats.  Then I put the top piece on and threaded the ribbon through both the spool and acetate on one side, through the tube, and through the acetate and spool on the other side and tied the ribbon in a knot.  The ribbon has to be untied to open the tube but this way nothing accidentally gets spilled.
5)  I made a rosette 2 1/2" wide, stamped the image in Cocoa, cut it out by hand, and inked the edges in Cocoa, and attached both with glue dots and my finished project was 5" tall.

This was such a fun project to make, I hope you enjoy it!

Kenya

Thursday, October 18, 2012

Heart2Heart meets CASual Friday

I have been wanting to try this card for some time but couldn't find the quilt pattern it was based off of so I decided to wing it and I think it came pretty close.  I am entering this card for the CASual Friday heart challenge as well as the Heart2Heart Christmas part 2 challenge.
 All products used were from Close To My Heart.  I used the Art Philosophy cartridge to cut this card using Colonial White cardstock.  All the patterned papers were from the Pear and Partridge kit cut at 1/2" widths.  I used the Card Chatter-Christmas (D1388) and last year's Holiday Wishes stamp sets in Cranberry ink.  I really kept this one clean and simple, I haven't even inked the edges although I may go back and add a small red bow to the heart on the front, what do you think?


Happy crafting!  Annette

Tuesday, October 2, 2012

Heart2Heart: Always Remember

Before I get to  the details of this card, I want to take a moment to honor and remember my mother, Diane, who passed away in 1984 from a rare form of breast cancer. She was only 35 years old and left behind a husband, 17 year old daughter (that was me), 15 and 5-year old sons, and a 17-day old baby girl as well as parents, siblings, and numerous other family members and friends. She was smart, funny, brave, a little off beat, loved scary movies and books but got genuinely scared by them, she was great with children and she is still missed every day. If you haven't had a mammogram yet this year, I urge you to do so and also to encourage your friends to do the same. Until we find a cure, early detection is our best weapon.


card details:  This week's challenge at Heart2Heart is a technique challenge of inking a stamp with one color and then rolling the edges in another color before applying the image to paper.  I chose a very basic, clean and simple card to try this approach and I'm hoping the color combination is not too subtle, but I used Blush for my base color on the retired Always Remember stamp set with Hollyhock as my edge color.  I cut the card shape at 5" height using the Art Philosophy cartridge, sponged Baby Pink on the edges, and I used Blush ink on the A Typeface alpha (A1117) and Hollyhock  on the "find the cure" sentiment which is also part of the Always Remember set.
 
Happy crafting!
 
Annette


Monday, October 1, 2012

Christmas JOY

I just got the Merry and Bright stamp set this weekend and have been trying a variety of techniques with it.  While I'm entering this card at the Heart2Heart Christmas part 1 challenge too late to be considered for the contest, I'm too pleased with how it finally came together not to share, LOL.

 
details:  All products used were from CTMH.  I started with adhering Cashmere cardstock onto a Colonial White die cut trifold card (Z1738) and I used the Pear and Partridge paper for the flap and "J" and "Y."  The sentiment and wreath are both from the Merry and Bright stamp set (C1510).  I stamped the sentiment in Cranberry and used New England Ivy ink on Olive cardstock for the wreath.  I stamped the little flowers (from the same set) on Colonia White using Cranberry ink but they were a little too bright so I gently sponged Bamboo to tone it down just the tiniest bit.  I made the bow using Cranberry grosgrain ribbon and used medium toned mocha Opaques (Z1333) on the letters and one of the Antiqued Copper brads (Z1410) on the flap.  FYI, I used my Gypsy to size and center two circles together at 2.25" and 1.25" so I could use my Cricut to cut the base for the wreath, and also used the decorative font on the Art Philosophy cartridge (also at 2.25") for the "J" and "Y."
 
Happy crafting!  Annette