Wednesday, February 5, 2014

a little card with lots of encouragement

When I saw this week's sketch at Retro Sketches I knew what stamps I wanted to ink up and I had a pretty good idea what I wanted to use for embellishments but then this one took on a life of its own!  I had to keep the card size at 3 1/2 x 3 1/2" to make good use of the stamps I wanted to use for the front and I had to vary from the sketch a bit and use 4 strips instead of the 3 shown in the sketch, but I tried a couple of new things on this card and was pleased with how they turned out.  Despite the card's small size, I still managed to pack a lot of encouragement into it and I plan to send it to my daughter for a little pick me up  as she has a really busy week coming up at college and she's at that midway point from when this term started and spring break begins.

details:  All products are from CTMH.  I started with the Laughing Lola.  The strips are made from the flip side of the magenta patterned paper and the zip strip from that paper.  I started off with the frame stamp in the Family Photo set (a Hostess Rewards set from the autumn/winter '13 Idea Book) and the sentiment is from the Paisley Perfect set stamped in black ink on Lagoon cardstock.  I have been experimenting with CTMH's  shimmer tape and found it can be cut with decorative edged scissors so I covered the frame image with black shimmer trim and trimmed with scalloped edged scissors.  For added embellishments, I used purple glitter gems and made my own bakers twine by twisting black and purple embroidery floss together with a strand of metallic silver I pulled from some metallic twine from another kit.  For the inside of the card, I used the A Typeface set in black ink.  I used gold embossing powder with the frame from the Laughing Lola cardmaking WOTG and the other sentiment from the Paisley Perfect set on black cardstock.  I used the Artbooking Cricut cartridge to cut the "be yourself" banner and the sentiment "always and forever" and then just fussy cut as I just wanted to use the "always."  I also used the Artbooking cartridge to cut the "1 of a kind" out of the gold cardstock that came in the Lola pack and "sweet" banner out of Gypsy cardstock.  Below are some pictures of how I lined up the shimmer trim on the frame stamp, just in case anyone needs a visual (which I usually do the first time I try something, lol.)

Saturday, February 1, 2014

oodles of fun

Sometimes you have to make a project just because you can, for the pleasure of it and for no other reason than the joy of inking up some new stamps.  The premier of new Idea Books is always an exciting time for CTMH enthusiasts but this is an especially exciting time for me.  I've had a lifelong dream of having some kind of hobby/craft business and for the last few years I've had the goal of slowly building up my business and reputation as a consultant for CTMH so that when I became an empty nester I would be ready to make that dream come true.  I am so happy to say that the last couple of weeks everything has really started coming together just the way I have imagined it:  I get to share a hobby I am passionate about, meet new people, and share new techniques and the delightful products CTMH designs.  So, this pretty much sums up how I'm feeling tonight and I have a hunch when everyone gets to see the Spring/Summer 2014 Idea Book starting today, a lot of folks are going to feel the same way!


details:  Naturally, all products are from CTMH.  The tag layers were cut using the Art Philosophy cartridge using the Dotty For You paper.  Then I arranged letters from the Framework alphabet in the center of the tag and on a separate piece of cardstock.  I then used Cranberry, Cotton Candy, Sunset, Topiary, Lagoon, and Gypsy with the new Oodles of Doodles stamp set to add colors to the stamped image on the spare cardstock, fussy cut each letter, and glued them in place.  I used the Doodle Signs (a hostess rewards exclusive stamp set) for the heart.  Since that image didn't have an outline I simply ran the edges of the piece over my black ink pad so that it would have the same kind of definition as the letters, and I finished the tag off with a strip of (discontinued) white grosgrain ribbon.

Happy crafting!  Annette

Tuesday, January 28, 2014

multiple stamps for Color My Heart challenge #78

The color combination at this week's Color My Heart challenge called for using Hollyhock and Indian Corn Blue.  My first thoughts ran to birthday cards but, as sometimes happens, nothing seemed to come together the way I wanted it to.  Finally I spread out several stamp sets that haven't seen much ink yet and so I turned to another Valentine's card and this is what I came up.

details:  All products are from Close To My Heart.  I started with a Whisper cardstock to make a 6x6" card base.  I used the Stitch Wonder stamp set for the mini quilt block squares, the arrow stamped image is from the Washi Wonders stamp set which is a hostess reward set (only available through 1/31), and I used foam adhesive squares to pop up the heart image in the center which is from the January Cloud Nine promotion.

Happy crafting!  Annette

Sunday, January 26, 2014

Love You to Pieces

I have spent a relaxing evening making cards while watching movies with my husband and when I came across an unfinished project from a year ago I immediately knew I could put it to use for a couple of current challenges.  I am using the sketch from Freshly Made Sketches and also sharing at Heart 2 Heart where the challenge this week is "two faced" or to use both sides of a designer paper.


details:  All products are from Close To My Heart.  I used the discontinued Roxie paper kit for the pieced heart as well as the card base as well as the discontinued Tulip for the banner.  I cut black shimmer trim in half to line the banner on the cover as well as the border inside the card.  I used Tulip ink for the sentiment from last year's "Happy Valentine's" Stamp of the Month on the cover and from the Stitch Wonder stamp set inside the card.  The large puzzle piece heart on the cover as well as the puzzle piece border on the inside were cut using the Artiste Cricut cartridge.

Happy crafting, Annette

Ivy Lane for Atlantic Hearts Sketch Challenge

I have only purchases one paper kit from CTMH's new Idea Book so far and I'm totally in love with it!  It has taken me several days to put this project together based on this week's sketch at Atlantic Hearts Sketch Challenge  I say project because I knew what elements I wanted to put together but they didn't size up quite the way I wanted so the finished size is 6 x 7 1/2 inches, so rather than using this for a card I'm thinking of making it the cover for a mini album.  I am also sharing this at this week's Heart 2 Heart challenge which calls for using both sides of a designer paper.


details:  All supplies are from Close To My Heart.  The green background paper and the multicolored paper for the vertical scalloped stripe are opposite sides of the the same paper from the Ivy Lane papers, and for the border I used the zip strips from the same kit and carefully mitered the corners.
I used the Artiste Cricut cartridge to cut the center shape and the scalloped stripe.  I sponged the edges of the center piece with the discontinued Pansy Purple and then I used the rock and roll stamping technique with the new Hello Wonderful stamp set in Blush and Hollyhock.  The sentiment in the corner is from the In The Moment, also using Pansy Purple.  To  make some of the cutout areas in the Cricut cut images stand out a little better, I added bitty and medium sized Opaques.

I have a feeling these stamps and this paper kit are going to be seeing a lot of use at my house!

Happy crafting,  Annette

Tuesday, January 14, 2014

Miss you already for combined challenges

Oh, my goodness, I am on a roll with not waiting until the last minute to figure out what I want to do for a challenge!  I actually had this card done Sunday morning, several days before one challenge was due and a whole week before the other closed but I had to wait to share it.  This weekend was the end of my daughter's winter break and we took her back to college Sunday afternoon and we could tell even the day before she went that it was going to be hard on her.  So my husband actually came up with the idea for me to make a card and mail it from home before she left so that she would get it in the mail the first or second day back.  Since I had already been playing around with color combinations and paper kits for this week's Color My Heart challenge to use Smoothie and the current sketch at Seize the Sketch it didn't take long to come up with something (although I did take the liberty of turning the sketch 90 degrees).  Even though this "Roxie" paper kit has been discontinued for a while, it is still one of my favorites.  Once I got going I would have loved to keep embellishing but I wanted to stay true to the sketch, so I ended up adding a little something extra to the stamping on the inside of the card as well as a little stamping on the back of the envelope.


details:  All three patterned papers are from the Roxie kit.  I cut both the banner and the flourished heart using the Art Philosophy Cricut cartridge from CTMH.  The banner is Smoothie cardstock stamped with black ink, and I added some black and clear sparkles.
For the top line of the  lettering I used the discontinued "Tiny Typewriter" alpha and the A Typeface alpha set.
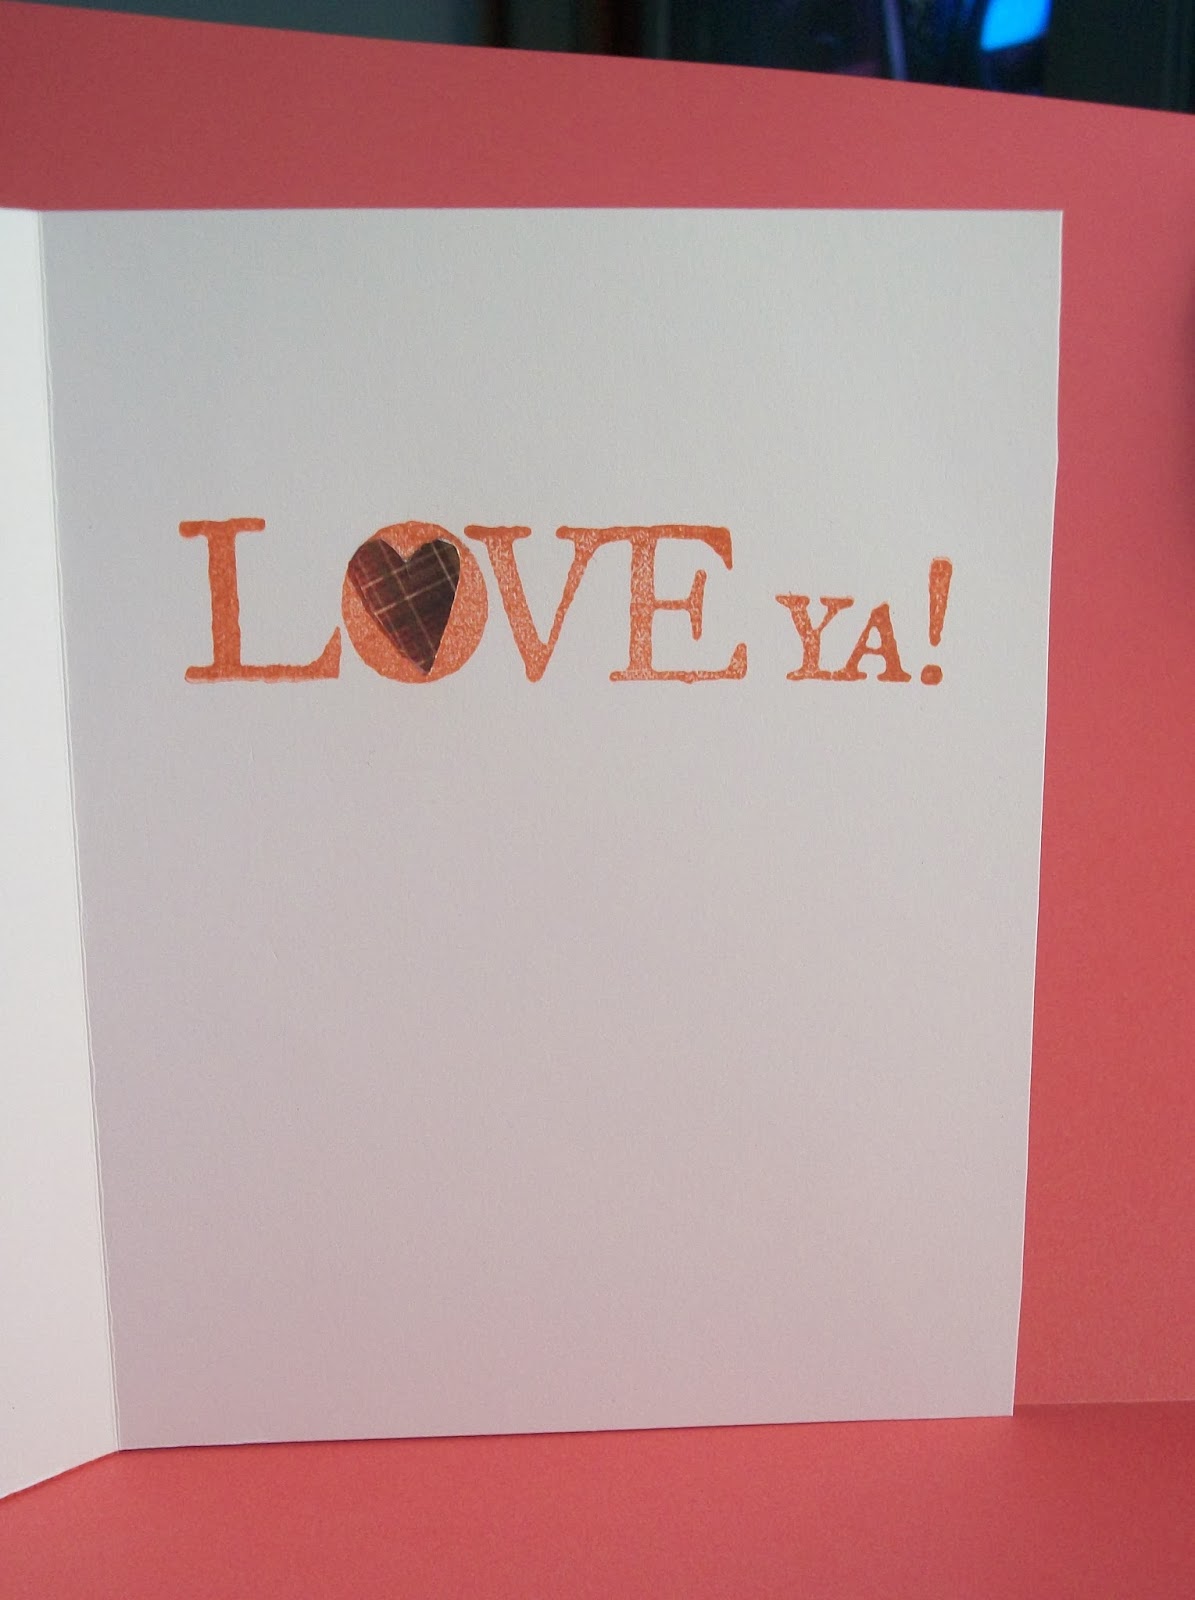
The inside of the card was stamped with Smoothie ink and the discontinued "Love ya!" set.  In this stamp there is actually a cut out heart in the center of the "o" so I stamped that image on the patterned paper I wanted to use and fussy cut the corresponding part of the image and layered it over the white space, and I placed the stamped image toward the top of the card to leave plenty of room for a hand written note (something I often forget to do).
The polka dotted "smile" heart stamp is from the "From My Heart" set which is long discontinued but I'm thinking CTMH should let this one make a comeback, especially now that we have several heart images to choose from in their exclusive Cricut cartridges!

So hopefully this will put a smile on our daughter's face and make her day a little brighter, especially when I tell her it was her dad's idea.

Happy crafting,  Annette

Saturday, January 11, 2014

Buzzing with good wishes for a Mojo Monday challenge

One of the goals I've set for myself this year is to NOT wait until the very last minute for inspiration to strike, and since tomorrow is going to be a very busy day at my house it was good motivation to work on this card today -- 1 whole day before the deadline!  lol  At any rate, I really liked the sketch challenge this week at Mojo Monday and for whatever reason, when I saw the vertical strip along the left side it made me think of the burlap ribbon I have since summer and only used once.  As I looked through my papers and stamps I came across this Quick Card-Bumblebee stamp I got to use with the Buzz and Bumble kit but had never gotten around to using, so this is what i came up with.

Both the honeycomb and orange patterned papers are from the discontinued B&B kit which called for Cocoa but I when I stamped it the first time I thought it came off a little darker than I wanted so I switched the ink for the bee stamp and the cardstock embellishment below that for Chocolate.  I also used Chocolate ink with the alpha from the "You Are My Happy" campaign this fall.  The cardstock embellishment was a cut from the Artiste Cricut cartridge from CTMH.  This card is quite a contrast from the last one I made which featured a snowflake background but if you lived anywhere in the US and experienced the cold snap that just went through, you'll understand why I'm dreaming of all things spring-related!
Happy crafting!  Annette