Tuesday, May 31, 2016

Thick Twine for Between The Folds Challenge

Hello and welcome back!  Today's project features CTMH's Thick Twine for the Between The Folds Challenge #22B.  Having started my crafting journey with needle arts, I love so many things about the thick twine:  the lustrous colors, the soft texture, and the versatile ways you can use it, just to name a few.  No matter what craft medium I'm working with at the moment, I love to combine colors and stretch myself to try new things, so of course I had to that with this project too.  So here's what I came up with:

details;  I started with this page from this background My Crush Everyday Life Page and this card from the January 2016 promotional kit "Picture My Life Live Your Day Scrapbooking Program."  In the center of the white heart, I used Thistle ink and this sentiment from the Wavy Blooms stamp set.  Then, using both the Glacier and Pixie thick twines, I unwound the two strands for each color and twisted one strand of each back together.  Next I used Liquid Glass adhesive to glue the twine down about one inch at a time to I could keep the dual colored strands tightly wound, and I outlined the heart.  Since these three colors are the foundational colors for the planner pages, I loved that I could get all three colors in my project by inking with one and twisting together strands of the thick twine from the other two colors.  I also love how easy it is to  personalize my planner and its pages.

Don't forget, you have until Monday, 6/6/16, at 10:55 p.m. to link your project if you want to create a project using Thick Twine and play along with us at this week's BTF challenge.  Even if you don't you will definitely want to check out the projects from the rest of the design team and the other participants.  The more the merrier!

Happy crafting!  ~~  Annette


Wednesday, May 18, 2016

My Crush Everyday Life Pages for CTMH Featured Products Blog Hop

Hello and welcome back!  This week our CTMH Featured Products Blog Hop participants are bringing you fun and inspiring projects created with the My Crush products.  If you found your way here from Jenifer's blog you are in the right place, but blog hops are circular so you can jump in anywhere along the way and just make the rounds and I have included a complete list of our particpants at the end of this post in case you get lost along the way.  Now, allow me to share my project with you today.
While I dearly LOVE my Everyday Life Planner, I haven't done nearly what I thought I would with it so it took me a little more time than usual to decide what I wanted my project to be but I knew I wanted to do something with the My Crush Everyday Life Pages that are designed to fit the planner.  I tried several projects, including a couple of coloring projects using watercolor paper and some new stamps, but I kept coming back to this pretty design, my favorite out of the whole pack.  While I don't know if my photo does it justice, I am SO happy with the way it turned out that I may not put it in my planner at all but frame it and hang it in my room (which features various shades of purple and lots of inspirational sayings, lol).

details:  I noticed that the new Rose Gold foil tape looked awesome with this shade of purple so I placed the page on my Versamat and used my favorite ruler ever and lined up a set of diagonal lines 3/4" apart using Rose Gold in the bottom corner and Silver Foil Tape in the upper right corner.  Then, letting the bokeh effects already on the paper guide me, I used a combination of the new Florence sequins with the silver ones from the new Calypso sequins, some darker burgandy colored sequins from an previous CTMH kit that I can't identify, plus some from the Oceanside and a couple of the larger silver sequins.  Overall, I think it made for a lovely variation in tone and color that really complements an already-lovely page.

So that's all there is to mine.  Please don't forget to hop on over to Kim's blog if you haven't been there already, and I hope  you will join stop by again for our next hop on 6/1/16 when we will be featuring projects made with the CTMH display trays.    Thanks!  ~~  Annette

complete list of participants:


3.  Annette Clark (here)

Graduation Card for AHSC #160

I can't believe it's time for another group of young people to be graduating high school and college!  Luckily, Michelle
Stewart over at Atlantic Hearts Sketch Challenge has given us another fun and fabulous sketch to work with so while this card had a lot of elements and was a tad time consuming, it actually came together quite easily. 


details:  I cut a 4 x 6" card base from Lagoon CS.  The star pattern is from the new Magical paper kit.  The blue in this kit is actually Crystal Blue but I was pleasantly surprised that it blended so well with the Lagoon as our recently consolidated school's new colors are teal (I use Lagoon), black and silver.  I used the stamp set that came with the Artiste cartridge (2 3/4" in black ink) for the center medallion and the same shape cut at 1 1/2" using a brushed silver paper from TPC Studio for the smaller medallions along with the retired 1 1/4" punch and Lagoon CS for the centers.  The graduation cap image is from the retired Congrats Graduate stamp, the diploma from the retired Diploma Day set, and the "Congratulations Graduate" sentiment was heat embossed (Versamark and silver Ranger embossing powder) using the retired You Did It stamp set.  I used the Art Philosophy cartridge to cut the pointed border at 1" and then trimmed it down so that just the points remained.  The sentiment in the lower corner is also from the Congrats Graduate set.

Thanks for stopping by and taking a look and please take time to stop by Atlantic Hearts Sketch Challenge to check out the projects by the rest of the design team.  Don't forget, you have until Sunday, 5/22, at 9 pm Central to share your project with us too!

Happy crafting!  ~~  Annette


Tuesday, May 17, 2016

Happy Times for a Friend

Hello, again!  I went "old school" and spent a lot of time on this layout featuring the Happy Times paper kit for this week's challenge at Between The Folds.  This paper is so versatile and so much fun, but don't forget that it's only available for the month of May in honor of National Scrapbooking Month!


Basically, I used the diagonal barn board looking paper in this kit and cut it into strips which I reverse dovetailed for the picket fence look, along with a pair of 12 x 1/4" strips placed horizontally behind the fence for a realistic look.  I backed this with the lovely multi-colored floral paper.  The photo mat measures 6 1/2 x 4 1/2", cut from the variegated magenta piece.  I initially tried to use the   pale yellow/diagonal pinstripe piece for the sentiment but it didn't stand out enough, so i used the top piece of that same variegated paper instead.  The sentiment is from the Someone Special stamp set, done in Pomengranate ink.


So, I thought I was done with this one but I just wasn't satisfied with it.  I decided to enlarge the photo mat, overlap the sentiment/title a bit, and add a little "bluebird of happiness" from the March Stamp of the Month "Sunshine Birdies" and a happy little kitten from the Friendly Pets set, both of which I stamped on scraps from the Happy Times papers and fussy cut.  I'm not sure if it would look better to anyone else, but it's much more my style.   Isn't it fun what a few little changes can do to a project?

And that's all there is to this one.  Now, I just have to get a good photo taken of me and my best friend of 35 years!  Don't forget to check out all the amazing projects featuring this lovely paper over at the BTF challenge blog and I hope you will share your artwork with us as well.
Happy crafting!  ~~  Annette

Wednesday, May 4, 2016

Artistry Cartridge for CTMH Featured Products Blog Hop

Hello and welcome back for another installment of the CTMH Featured Products Blog Hop where this week we are bringing inspiration using the exclusive Artistry Cricut cartridge.  We have lots of fun in store for you so lets get started!  You should have arrived here from Corinna's blog but as always, blog hops are circular things so you are welcome to jump in at any point along the way and simply follow the links until you've made the rounds.  Now on to my project...


If you're a fan of CTMH products you have no doubt seen the lovely and versatile Happy Times promotional paper kit available just for the month of May in honor of National Scrapbooking Month.  I have to say, these papers and this cartridge are both so much fun to work with that I'm not sure which I love more!  This project was pretty simple and while I don't know if you can see it based on this photo, I manipulated the positioning of the deer head images in Design Space so that they would be cut in the middle of the variegated paper so as to have an ombre effect.  This is my first project featuring the very popular deer heads and I am loving the way this one looks on my living room wall so much that I may have to make another version when autumn rolls around.

So that's all for now.  The next stop on the hop is Lauren's blog but don't forget to check out all the projects and please join us again on May 18th when we will be inspiring you with projects featuring the My Crush pages.  Thanks for stopping by and happy crafting!  ~~  Annette

Happy Times for AHSC #158

I am so excited to share this project with you today!  Not only has Michelle Stewart outdone herself with this fabulous and versatile sketch to challenge us with for Atlantic Hearts Sketch Challenge #158, but I got to use CTMH's new kit "Happy Times" in honor of May being National Scrapbooking Month.  And finally the icing on the cake was that this paper helped me put together this card I've had in mind for a dear and lovely couple's upcoming wedding, which is barn themed with mint as the primary color.  This card was especially important to me as the young couple have been together since they were in high school plus the bride's mother was a childhood friend of mine, a high school friend of my husband's, and she was one of the witnesses when my husband and I eloped and got married by a Justice of the Peace.

details:  As stated, I used  mostly the Happy Times kit.  I planned to use the piece that looks like whitewashed wood but there wasn't enough contrast when I actually paired it with the mint striped and white-with-mint outlined flowers.  Luckily I have just a bit of a paper stash (ha ha) and after comparing several pieces, the one I liked best was this gray-based barn board looking paper from the long discontinued Dakota kit.  I used gold embossing powder and Versamark to heat emboss all the sentiments on the cover from the Mr. and Mrs. stamp set.  I used a bit of my favorite white and gold ribbon and the (retired) Gold Puffies for the heart.

For the inside, I again used gold heat embossing for this sentiment from The Happy Couple stamp set set on the same mint striped panel from the four squares on the front.  I backed that with a bit from the gold and white striped paper in the Happy Times kit and fussy cut the dovetails.  I am super happy with the way this one turned out but it is so hard to get a good photo of shiny embossing or metallics, I just don't feel like my photo does the card justice.  Don't forget to pick up a pack of this Happy Times paper during the month of May, it is so lovely and versatile it's sure to be a big hit.  I also invite you to play along with us at AHSC where there is never a shortage of inspiration!

Thanks for stopping by and happy crafting,  Annette


Tuesday, May 3, 2016

Fancy Folds and Flip Flaps for Between The Folds Challenge

Hello and thanks for stopping by once again.  When I realized this particular theme for Between The Folds Challenge Blog was to use Fancy Folds of Flip Flaps, I chose to take this opportunity to create a particularly meaningful, and very sensitive, layout and I have done my best to handle this topic delicately.  I have had many conversations with friends and fellow memory keepers about the difficulty of preserving the memories of the loss or stillbirth of a child and having experienced both in my life, I decided it was time to tackle this bittersweet subject in hopes I can help others on their journeys of love and loss.  So please note that while it may not be everyone's choice, my layout does contain photos of my deceased son BUT I have covered those particular photos with paper doilies both for our privacy and also because I know these photos can make some people uncomfortable, which made this the perfect project to use the Flip Flaps.  Let's take a look...


In addition to the use of the Flip Flaps, I chose the Georgie paper for this project, and this is the layout as you would see it in an album.  It contains photos of my husband and I together late in my pregnancy.  I positioned two 6 x 12" Flips Flaps from the large assortment so they met in the middle and then I adhered a laminated copy of the card from the service on one side so that it holds the other side down.  This way, the card can still be opened easily but the viewer must choose whether or not to lift and open the Flip Flaps and view the inside.

Out of respect for those who may  not be comfortable or interested in the rest of this project, I have included the rest of the photos at the bottom of this page.  I hope you will all take time to check out the projects our other design team members and our participants have shared as they are very inspiring, and I hope you will take time to join the fun and share your creations as well.

Thanks for stopping by and happy crafting!  ~~  Annette


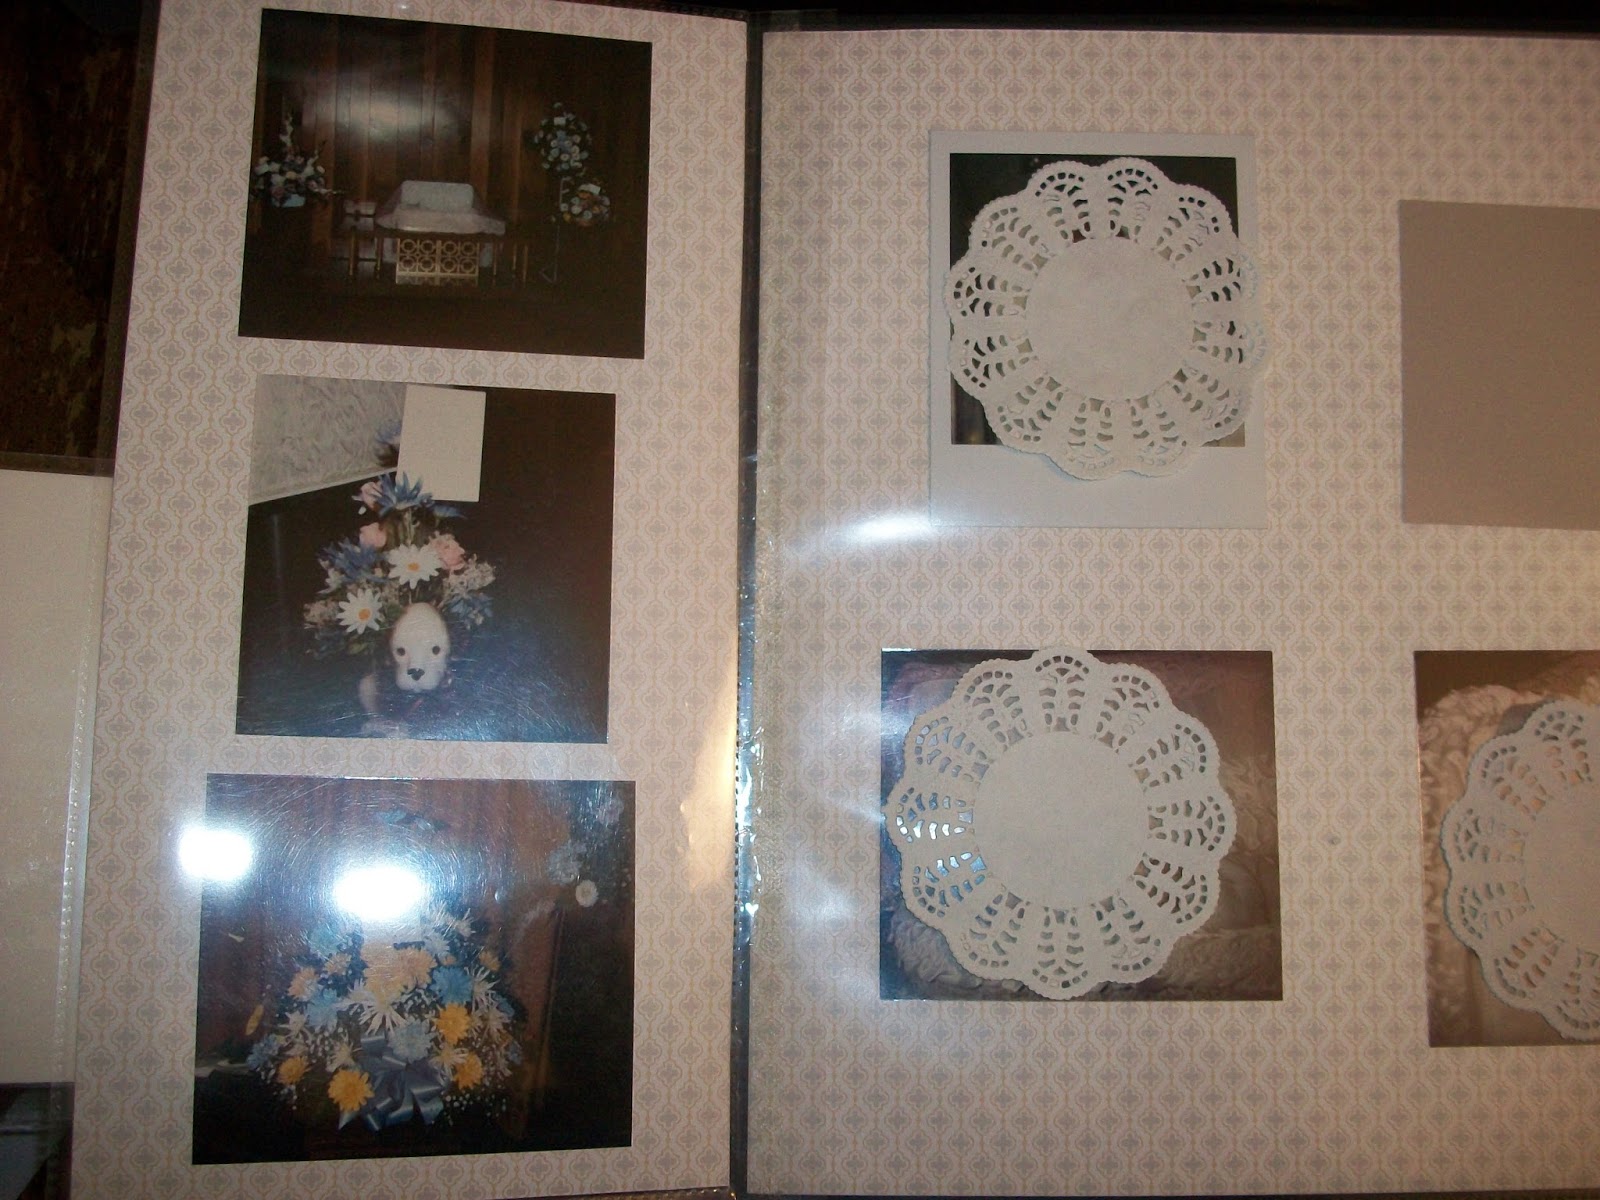
So, for those who are interested, here is the rest of my project.  This first photo is a little blurry as it was hard to fit it all into one shot, but this is how the layout appears once both flip  flaps have been opened and it spread out to the full width of 24".  The following photos are of the left and right sides respectively, and as stated I have placed doilies over the photos that actually show my stillborn son.


 In the particular circumstances surrounding the stillbirth of my first son, I was experiencing medical issues as well and was not allowed to leave the hospital to attend the service and had to rely on my mother-in-law to take care of most of the planning.


Initially I was not overly happy that she had taken "funeral photos" as this was not something I was accustomed to at the time, but now I am so thankful that she did.  I only got to see my son for a minute or two before his body was taken to another hospital for an autopsy and for a private viewing the funeral director arranged for me and my husband in my hospital room.  However, these are the only photos I will ever have of him, who looked so much like my younger brother, and while I don't look at them often I am actually glad now that I *can* look at them when I want to.
Thanks for taking time to view this project and please feel free to contact me if you have any further questions or need help creating your own memorial layout.  As with all memory keeping, there is no "right" or "wrong" to how you choose to preserve your memories and some are undoubtedly more difficult to tackle than others, but they are all precious and help make us who we are.  ~~  ac